AZImage help - Quickstart - Adding files
You are here > Index > Quickstart > Adding files
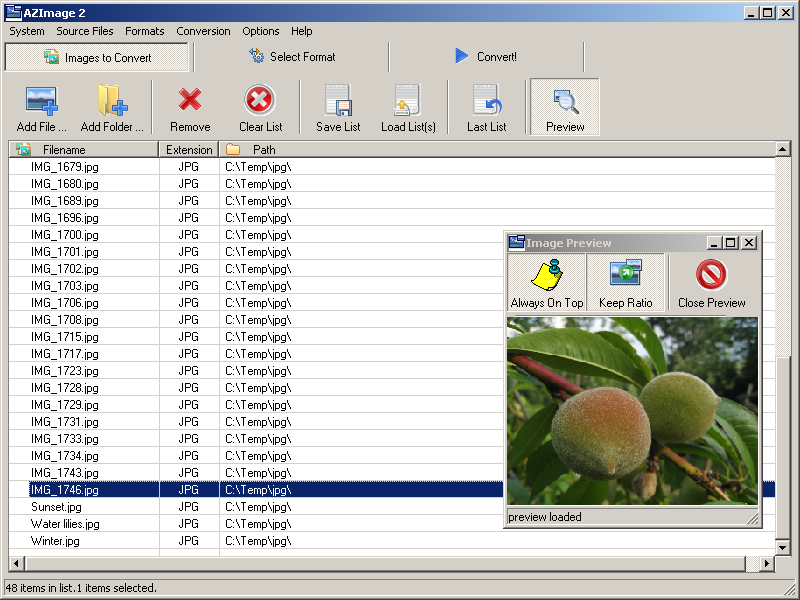
The first tab of the main window lists the files that will be converted.
There are multiple possibilities to add files for the conversion. The files are by default appended to the current list:
- drag and drop files from any windows explorer window or some other file manager that supports the same interface as windows explorer
- use the Add File button and select one or more files in the standard open dialog that is opened. Press SHIFT or CTRL to select mutiple files (SHIFT for contiguous file selection, CTRL to select separate files)
- use the Add Folder button and select a Folder. You can add images in all subfolders or restrict to the selected folder
- right click on the files in windows explorer and select Open with AZImage. This will open a new AZImage window and add only the selected files to the list
- load a previously saved list.
Once added, the files can be removed using the Delete button. Only the selected files will be removed. The list can also be cleared by selecting Clear List (the user confirmation is needed).
If the same files are to be coverted later, the list can be saved by clicking Save List and entering a file name. The list can be later loaded and processed with another format. In the case one has started compiling the file list and has no time to start the conversion, the list is automatically saved on exit. It can be later loaded simply by clicking Last List.
The files in the list can be previewed. By clicking on the "Preview" button you open the preview window. The files are displayed scaled to the size of the preview window. The preview can take up to some seconds, depending on the size of the files and the performance of the computer.
See also >
